Stepper Motor Adapter
Notes
- ⚠️ IMPORTANT: The type of filament used for printing will be dependent on the specific applications you have in mind for the XFAVR device.
- If you work in a chemical lab and typically use organic solvents such as DCM, ethyl acetate, chloroform, methanol, etc, then PLA will not serve a sufficient filament for printing as PLA is slightly soluble in most organic solvents.
- We recommend using a PVA (polyvinyl alcohol) filament for 3D printing if the XFAVR device will be in close contact with these organic solvents. Keep in mind that the PVA filament is water-soluble, so if you will be working with aqeuous solvents (such as in a biology lab), then please use PLA as a filament.
- Note: We recognize that PVA is considerably more expensive than PLA. If you are working in a chemical lab with organic solvents that may come in contact with the XFAVR device during operation and strongly prefer not using PVA, PLA can be used if it is covered with a chemically resistant material. We had some success with wrapping the printed components using a clear garbage bag (such as this one), cutting the excess garbage bag plastic using scissors, and tying the ends with a small ziptie.
TLDR (Too Long, Didn’t Read): If using organic solvents, it is recommended to print with PVA filament. If using aqueous solvents, it is recommended to print with PLA filament.
Files
If you have not done so already, please clone the XFAVR Github repository using the command below:
git clone https://github.com/mastrofran/XFAVR-Auto-Column-Chromatography.gitThe files to be printed are located in the ‘3D Printing Files’ subfolder.
The file for the stepper motor adapter component is the ‘SingleStepperMotorAdapter.stl’ file.
For printing PLA, the recommended printing temperature is ~200 °C. For PVA, the recommended printing temperature is ~220 °C. Please follow the recommended printing temperature for your respective PLA or PVA filament. The recommended 3D printer bed temperature is 60 °C and 50 °C for PLA and PVA, respectively.
Print Settings
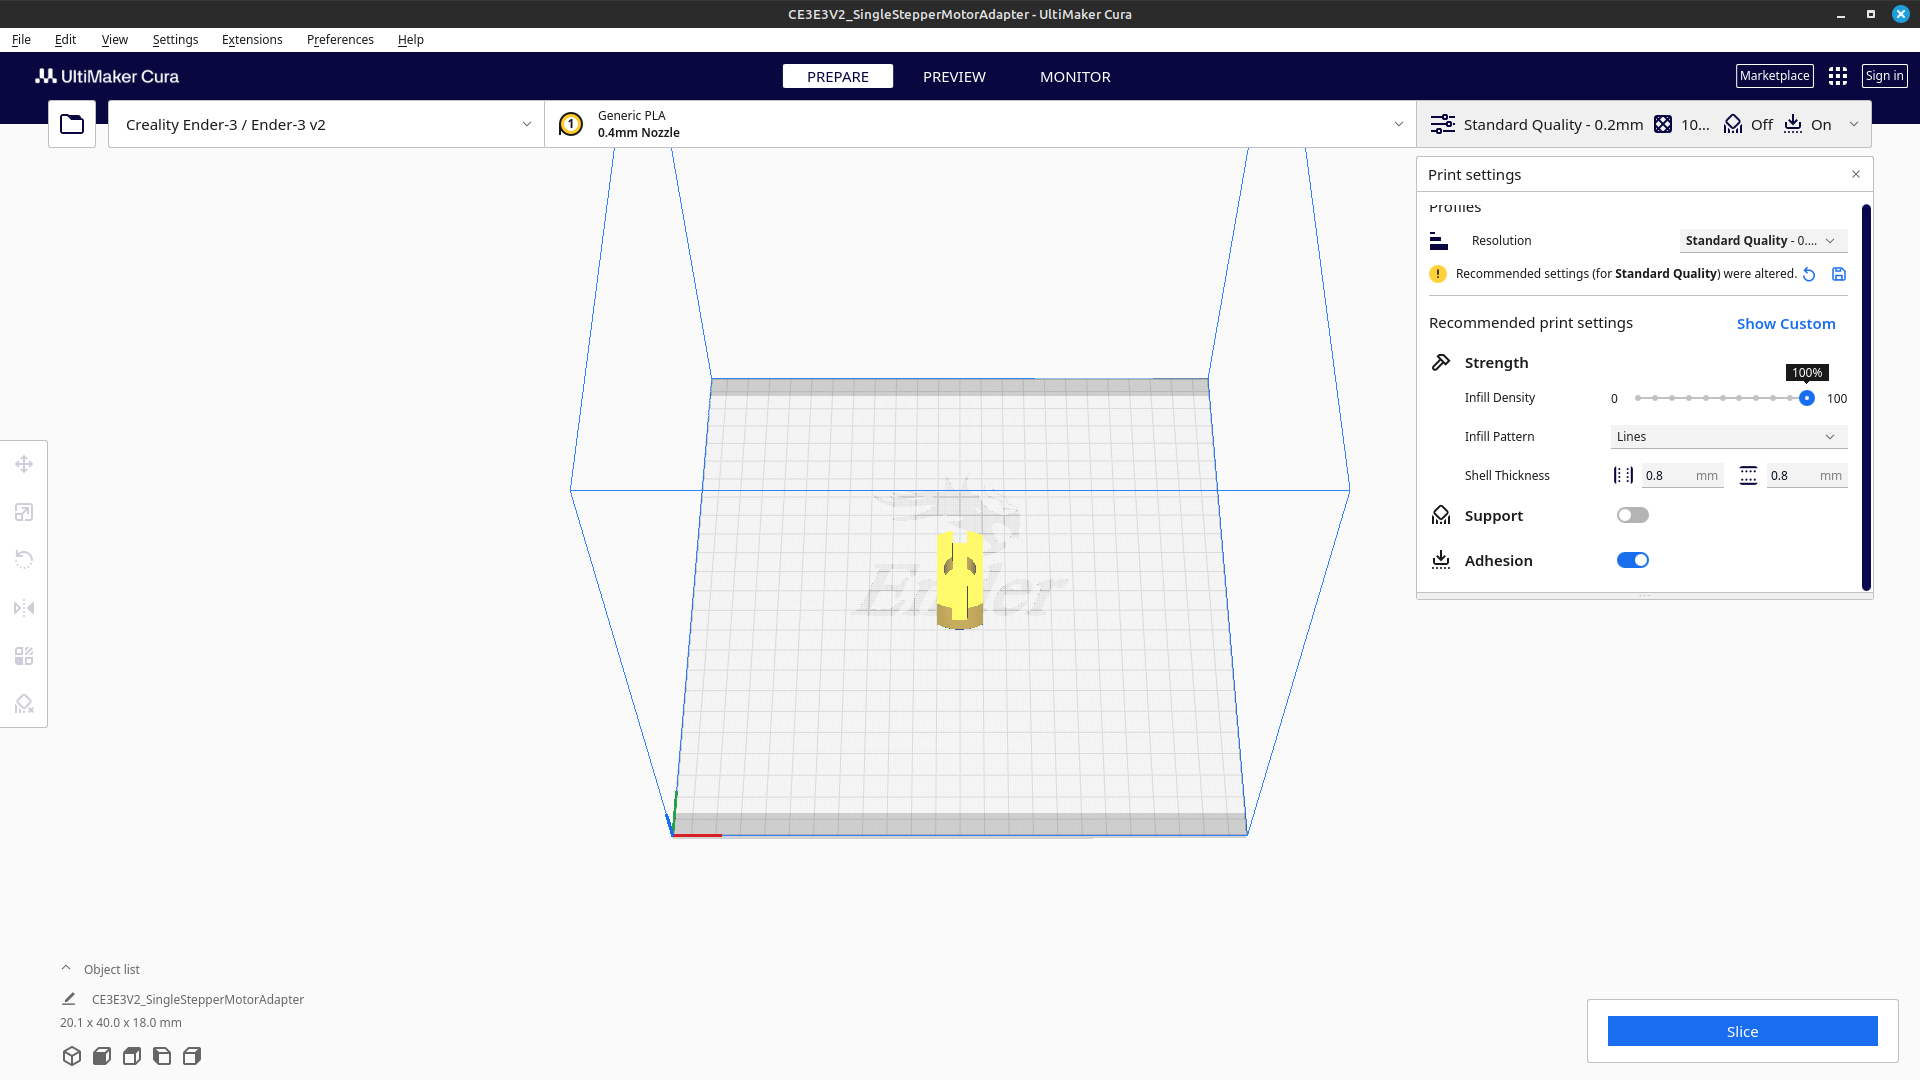
| Setting | Value |
|---|---|
| Infill Density | 100% |
| Infill Pattern | Lines |
| Shell Thickness | 0.8 mm (Walls), 0.8 mm (Top & Bottom) |
| Layer Height | 0.20 mm |
| Support | None |
| Adhesion | Brim (or Skirt) |
Example of Cura program using the correct settings with PLA as the chosen filament:

⚠️ The same settings would be used if PVA is your filament of choice.
After confirming the correct settings, click on the blue ‘Slice’ button in the bottom right of Cura and save the output to a removable microSD card/USB thumbdrive depending on the input memory device that your printer utilizes and begin printing the structures on your 3D printer.